
Dell Laptop Screen Not Turning On: A Complete Troubleshooting Guide
Introduction
A black screen on a Dell laptop can stop your work cold. You hear fans. You see keyboard lights. Yet the display shows nothing. The good news is that most cases have clear causes and simple fixes when you test in the right order. This guide walks you through a proven sequence that separates software from hardware in minutes. You will start with fast checks, use built in Dell diagnostics, move through Windows recovery tools, and finish with safe hardware steps.
Each section explains why the step matters and what result to expect. Use a second device to follow along and download drivers if needed. If you need repair, you will know which part to replace or how to speak with support. We will begin by identifying your exact black screen scenario so every next action is targeted and efficient.
Quick Triage: Identify Your Black Screen Scenario
Before changing settings or removing parts, define the problem you have. Different black screens point to different root causes. Use these quick checks to sort your case:
– No logo, no backlight, no sound: suspect power delivery, logic board, or RAM.
– Dell logo appears, then black: suspect graphics drivers, updates, or Windows boot corruption.
– Black screen with moving cursor: explorer crash, user profile issue, or GPU driver fault.
– Black after login: startup app, display output selection, or hybrid graphics switch.
– Backlight glow but no image: panel signal path or GPU output problem.
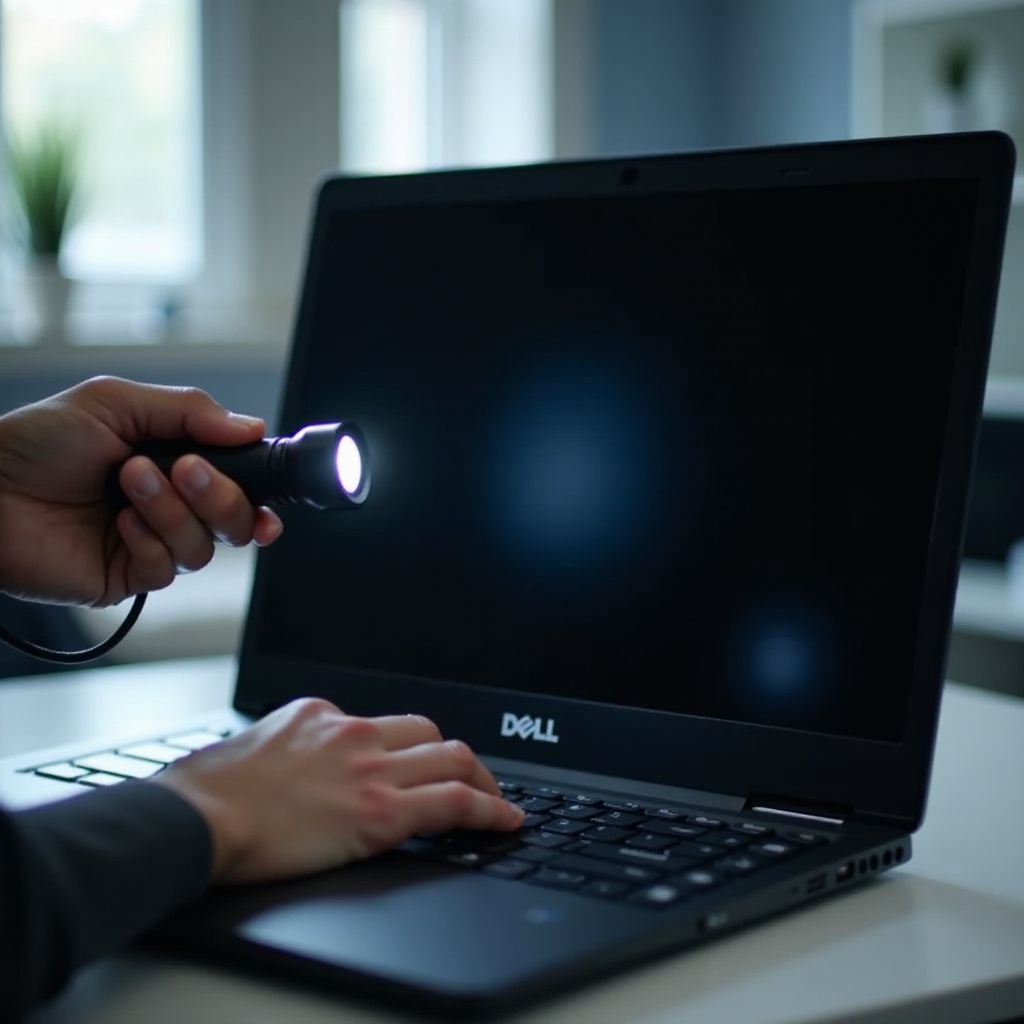
– No backlight but faint image under a flashlight: backlight failure or power to backlight.
– Works on external monitor only: internal panel or eDP cable fault.
– Beeps or LED blink codes: hardware failure; note the pattern for diagnostics.
Match your scenario to the next steps to avoid random trial and error. With a likely cause in mind, you can perform focused checks. Now that you understand the symptoms, set up a safe workspace and gather what you need.
Safety and Preparation Checklist
Good preparation protects your data and your laptop. Do this first:
– Shut down the laptop before opening any panel.
– Unplug the charger and remove all accessories and docks.
– If removable, take out the battery; if not, proceed with care.
– Ground yourself to avoid static discharge damage.
– Keep a second device nearby for guides, BIOS files, and drivers.
– Prepare a USB drive for recovery tools or a Windows installer.
– Locate your BitLocker recovery key if you use device encryption.
These basics reduce risk and speed the process. With safety covered, confirm that power delivery is solid before you chase display issues.
Step 1: Verify Power, Adapter Wattage, Battery Charge, and Indicator LEDs
Power faults often masquerade as display problems. Check these items in order:
1) Test the wall outlet with another device to confirm power.
2) Inspect the adapter cable and barrel or USB C tip for kinks, burns, or wobble.
3) Use the correct wattage adapter for your model. An undersized adapter can boot the system but fail to power the screen or GPU under load.
4) Plug in and check the LED on the adapter and laptop. A steady light usually means power flows. If it blinks in a pattern, note it.
5) Hold the power button for 10 seconds to force off. Press once to turn on. Watch for keyboard backlight, Caps Lock response, or fan spin as signs of life.
6) If your model has a battery status meter, press it. If low, let it charge for 30 minutes and try again.
If lights remain off or blink in error patterns, capture the code for later. If basic power checks pass but the screen stays black, try simple display key combos next.
Step 2: Use Brightness Keys, Display Toggle, and Ctrl + Shift + Win + B
A single hotkey often restores the image:
– Raise brightness with Fn plus the brightness up key.
– Cycle display modes with Win + P, then press arrow keys and Enter to try each mode.
– On some models, Fn + F8 or Fn + F4 switches between internal and external displays.
– Reset the graphics driver with Ctrl + Shift + Win + B. You should hear a beep and see a brief flicker.
Disconnect docks and extra screens while testing. If the screen returns, adjust your display settings and keep your drivers updated. If nothing changes, clear residual power to reset embedded controllers before deeper tests.

Step 3: Force Shutdown and Perform a Power Drain
A stuck embedded controller can hold the screen dark. Clear it with a power drain:
1) Hold the power button for 10 to 15 seconds until the laptop shuts off.
2) Unplug the charger. If the battery is removable, take it out.
3) Press and hold the power button for 30 seconds to discharge residual power.
4) Reinstall the battery if removed. Plug in the charger. Power on.
This reset often revives the backlight or panel. If the display stays black, test video output with another screen to isolate panel versus system issues.
Step 4: Test an External Display via HDMI, USB C, or DisplayPort and Rule Out Docks
An external monitor quickly reveals where the problem sits:
1) Connect an external display via HDMI, DisplayPort, or USB C Alt Mode.
2) Power on the monitor first, then turn on the laptop.
3) Use Win + P to cycle display modes. Try Duplicate and Second screen only.
4) If you see a picture externally but not on the built in panel, suspect the internal cable or panel.
5) If nothing appears on any screen, suspect GPU, RAM, or boot issues.
Remove all docks, hubs, and adapters while testing. A faulty dock can block output. With external output status known, use Dell built in diagnostics to separate panel failures from system faults.
Step 5: Run Dell LCD BIST and ePSA Diagnostics to Separate Panel vs System Issues
Dell includes two key tests that work outside Windows:
– LCD BIST, the built in self test: With the laptop off, press and hold D, then press the power button. Keep holding D until color bars appear. If you see color bars, the panel and backlight are working.
– ePSA diagnostics: Power on and tap F12 repeatedly to open the one time boot menu. Select Diagnostics. Let the tests run. If ePSA shows graphics output to an external display but not the panel, the cable or panel is likely at fault.
Record any error codes for support. If BIST fails or shows no image, the panel or its backlight power is likely bad. If both tests pass yet Windows is black, focus on software and firmware. The next step resets BIOS settings that control graphics paths and updates critical firmware.
Step 6: Reset BIOS or UEFI, Check Hybrid Graphics or Optimus Settings, and Update Firmware
Misconfigured firmware can hide the display output or misroute it. Fix it this way:
1) Enter BIOS or UEFI by tapping F2 at power on.
2) Load setup defaults. Save and exit to clear misconfigurations.
3) Check graphics options. On models with hybrid graphics, test toggling between hybrid or Optimus and discrete only modes. Save and reboot after each change.
4) Update BIOS to the latest version from Dell Support using your Service Tag. Keep the charger connected during the update and do not interrupt power.
5) While in BIOS, confirm that the adapter is detected and at full wattage. If it reads unknown or low wattage, replace the adapter or inspect the DC in jack.
If BIOS changes do not restore the screen, Windows may load a bad graphics driver or a startup app that blanks the display. Safe Mode helps you clean that up with minimal risk.
Step 7: Boot to Safe Mode, Clean Reinstall Graphics Drivers, and Test
Safe Mode loads basic drivers that rarely fail and lets you fix display software:
1) Interrupt boot three times to trigger Windows Recovery, or hold Shift while selecting Restart from the power menu.
2) Go to Troubleshoot, Advanced options, Startup Settings, then press 4 for Safe Mode.
3) In Safe Mode, open Device Manager and expand Display adapters.
4) Uninstall each GPU device. If the option appears, check the box to delete driver software for this device.
5) Optionally use Display Driver Uninstaller for a clean sweep. Follow its Safe Mode guide and reboot when it finishes.
6) Install the latest graphics drivers from Dell Support for your model. Prefer Dell packages over generic vendor drivers for best compatibility.
7) Test multiple wake cycles, lid open and close, and external display switching to confirm stability.
If the display works in Safe Mode but fails after driver install, try an older Dell driver or a clean boot to isolate conflicts. If Safe Mode also shows no picture, use Windows recovery tools to fix boot and system files.
Step 8: Use Windows Recovery Options: Startup Repair, System Restore, Update Uninstall, and Data Backup
Windows tools can reverse changes that caused the blackout:
1) From Windows Recovery, run Startup Repair and let it apply fixes.
2) Use System Restore to roll back to a point from before the issue began.
3) Uninstall the latest quality or feature updates if the problem started after an update.
4) Open Command Prompt and run these commands in order:
– sfc /scannow
– DISM /Online /Cleanup-Image /RestoreHealth
5) Back up files using Command Prompt, a recovery drive, or a Linux live USB if needed.
6) If nothing helps, perform an in place repair install of Windows while keeping files.
If recovery tools complete and you still see no image on the built in panel, recheck hardware. Focus on connections, hinges, and common mechanical failure points that affect the panel signal.
Step 9: Fix Sleep or Hibernate Loops: Disable Fast Startup and Adjust Power Settings
Black screens often follow sleep or Modern Standby issues. Stabilize power behavior to prevent a repeat:
1) In Control Panel, Power Options, choose what the power buttons do, then turn off Fast Startup.
2) In advanced power settings, set Turn off display and Sleep to longer times while testing and disable hybrid sleep.
3) In Device Manager, on display adapters and network cards, uncheck Allow the computer to turn off this device to save power when available.
4) Close or disable apps that block a clean wake, such as heavy GPU overlays.
Test several sleep and wake cycles and lid closes. If the screen wakes reliably now, your issue was a power state bug. If not, inspect internal hardware next.
Step 10: Hardware Checks: Reseat RAM, Inspect eDP Display Cable and Hinges, and Look for Damage
Loose or damaged parts can cut video to the panel. Proceed with care and follow your model service manual:
1) Power off. Unplug the charger. Discharge power with a 30 second press of the power button.
2) Remove the bottom cover. Keep screws organized by location.
3) Reseat RAM: remove each module, brush contacts gently, and reinstall until latches click. If available, test with a known good stick in each slot.
4) Trace the eDP cable from the motherboard to the panel. Look for pinches near the hinge, frayed shielding, or loose latches at the connectors.
5) Inspect for liquid signs, corrosion, or burnt components near the display connector and power circuitry.
6) Ensure the fan and heatsink area is free of dust. Severe heat can trigger GPU failures and intermittent black screens.
7) Reassemble and test. If the issue improves with lid position, the cable is likely stressed and needs replacement.
If reseating and inspection fix intermittent blanks, secure the cable path with correct strain relief. If you find obvious damage, plan a part replacement guided by the next section.
Step 11: Distinguish Backlight Failure vs No Video Output
Knowing which failure you face saves time and money:
– Flashlight test: shine a bright light at an angle onto the screen. If you see a faint desktop, the backlight or power to it has failed.
– No faint image under a light: likely no video signal to the panel or a dead panel controller.
– External monitor works while the built in stays dark: panel or cable issue is most likely.
– BIST shows color bars but Windows stays black: software or driver problem.
– BIST shows nothing and external works: panel or backlight failure.
These clues point to the right fix. With a likely part identified, you can choose the most cost effective repair path and avoid unnecessary board replacements.
Step 12: Repair Paths, Costs, and Warranty: Panel, Cable, Motherboard, and Service Options
Once you isolate the failing part, pick a repair plan that matches your budget and skills:
– eDP cable: cheapest fix; replace if pinched or cracked insulation is visible, or if movement at the hinge changes the image.
– LCD panel: replace if BIST fails or the flashlight test shows a faint image. Order the correct size, resolution, refresh rate, and connector type.
– Motherboard or GPU: consider only if external display also fails and diagnostics point to system board faults. Compare cost against a replacement laptop.
– DC in board or power rails: replace if adapter detection and system power are unstable.
Cost guidance varies by model and parts availability:
– Cable: low cost part and roughly an hour of labor.
– Panel: moderate cost with one to two hours of labor depending on the chassis.
– Motherboard: high cost and risk; preserve data first and weigh total value.
Check warranty status with your Service Tag on Dell Support. Onsite or mail in repair may cover parts and labor. If out of warranty, use an authorized repair shop and request a written estimate and part numbers. With repair options set, lock in good habits to prevent a repeat black screen.
Prevention Tips to Avoid Future Dell Black Screen Issues
Prevention reduces downtime and protects your investment:
– Keep BIOS and GPU drivers updated from Dell Support rather than random sources.
– Use the correct wattage adapter and avoid low quality third party chargers.
– Support the lid near the hinge when opening to reduce eDP cable stress.
– Clean vents and fans to prevent heat related GPU and VRM failures.
– Avoid forced shutdowns; let Windows close apps before sleep or hibernate.
– Disable Fast Startup if you experience recurring wake issues.
– Back up important files regularly so troubleshooting is low stress.
These habits keep the display signal stable and extend panel life. If a black screen returns, you can retrace this guide quickly and fix it fast.
Conclusion
Now you have a clear, step by step path to fix a Dell laptop screen not turning on. Start with power checks and display hotkeys. Use an external monitor to isolate the fault. Run BIST and ePSA to split panel and system issues. Reset firmware, clean reinstall graphics drivers, and leverage Windows recovery when software breaks the display. If needed, reseat RAM and inspect the eDP cable and hinge area. Replace the panel or cable only when tests confirm the fault. Keep BIOS and drivers current and handle the lid carefully. With these steps, most black screen cases move from panic to solved in a single session.
Frequently Asked Questions
Why does my Dell laptop power on but the screen stays black, and how can I tell if it is a display or system issue?
Connect an external monitor. If the external shows video, the internal panel or eDP cable is likely bad. Run LCD BIST by holding D while pressing power; color bars mean the panel and backlight work, so focus on drivers or Windows. If BIST fails and external works, replace the panel or cable. If nothing shows anywhere, suspect RAM, GPU, or motherboard and run ePSA diagnostics from F12.
How do I run the Dell LCD BIST and ePSA diagnostics if I cannot see anything on the screen?
For LCD BIST, power off, hold D, then press power and keep holding until you hear beeps or see color bars. For ePSA, power on and tap F12 repeatedly to open the boot menu, then choose Diagnostics. If the screen is blank, still tap F12 several times and press Enter after a short pause to start ePSA. Record any codes and check them on Dell Support using your Service Tag.
Is a black screen on a Dell laptop usually software or hardware, and when should I seek professional repair?
Many cases start as software or power state issues such as bad GPU drivers or failed updates. Safe Mode driver cleanup and Windows recovery often fix them. If LCD BIST fails, or the flashlight test shows a faint image, the panel or backlight is bad. If no output appears on external displays, the GPU or motherboard may have failed. Seek repair when ePSA reports errors, when the hinge cable is damaged, or when updates and Safe Mode do not restore the display.